
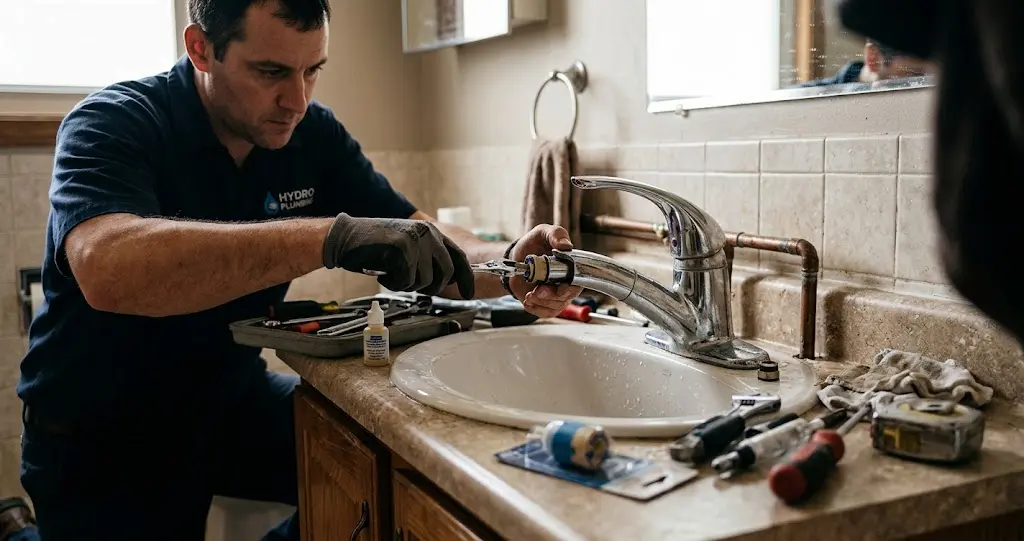
A dripping faucet wastes more water than most people expect. It also raises your bill and stains the sink. The good news is that most faucet and fixture repair jobs need only basic tools and one small part. This guide shows you how to find the cause, fix it, and spot the moment to call a licensed plumber. Professional plumbers follow the same steps, so you can repair with confidence.
Why Faucets and Fixtures Fail
Water pressure, mineral buildup, and daily use wear down every fixture. Most problems start small. However, a small leak grows fast when you ignore it.
Here are the usual culprits:
- Worn rubber washers and O-rings
- Clogged aerators from sediment
- Corroded valve seats
- Loose supply line connections
- A cracked faucet cartridge
Know Your Faucet Type First
Each design fails in its own way. Check the handle style, then match it to the table below.
| Faucet Type | Common Fault | Typical Fix |
| Compression | Worn washer or seat | Replace washer, clean seat |
| Ball | Worn seals and springs | Install a rebuild kit |
| Cartridge | Damaged O-ring | Replace the cartridge |
| Ceramic disc | Sediment on the discs | Clean or swap the disc cartridge |
Tools and Materials You Need
Gather everything before you start. Nothing slows a repair like a missing part.
- Adjustable wrench and slip joint pliers
- Screwdrivers and an Allen key
- Plumber’s tape and pipe dope
- Replacement washers, O-rings, or cartridge
- A small bucket and old towels
- White vinegar for descaling
More Read: Plumbing Repair: What Every Homeowner Should Know Before Something Goes Wrong
How to Fix a Leaky Faucet Step by Step
Follow this basic order for almost any leaky faucet.
- Step one: Close the shut-off valves under the sink. Then open the faucet to drain leftover water.
- Step two: Plug the drain so small screws cannot fall in.
- Step three: Pop off the cap and remove the handle screw.
- Step four: Pull out the stem or cartridge with your wrench.
- Step five: Inspect the washer, seat, and O-ring. Replace anything cracked or flat.
- Step six: Reassemble in reverse order and turn the water on slowly.
Take a photo at each stage. It makes reassembly far easier.
Fixing Low Water Pressure
Low flow usually points to a clogged aerator. Unscrew it from the spout and soak it in vinegar for an hour. Then scrub away the limescale and reinstall it. check there first.
Stopping Leaks at the Base
Water at the base often means a failed O-ring or a loose mounting nut. Remove the spout, slide off the old rings, and coat the new ones with plumber’s grease. Meanwhile, check the deck gasket for cracks.
Tightening a Loose or Stiff Handle
A loose handle needs only a firmer set screw. A stiff handle, on the other hand, needs fresh grease on the stem. Also look for hardened mineral deposits inside.
More Read: Leak Detection & Repair: Find Hidden Leaks Before They Cause Damage
Fixing Drain and Trap Leaks
A leaky P-trap often traces back to a tailpiece that is too short or badly aligned. Place a bucket underneath, loosen the slip nuts, and clean the trap. Next, cut a new tailpiece with a tubing cutter if needed. Tighten the compression nuts by hand first, then give them a quarter turn with pliers. Finally, run water and check every joint.
If the trap is cracked, replace it. Cleaning will not save a damaged part.
Other Common Fixture Problems
| Problem | Likely Cause | Quick Fix |
| Running toilet | Worn flapper | Replace the flapper |
| Weak showerhead | Clogged nozzles | Soak in vinegar |
| Slow sink drain | Hair and soap clog | Use a drain snake |
| Whistling pipes | High pressure | Check the pressure regulator |
| Hot water only trickles | Sediment in the valve | Clean or replace the cartridge |
A wet spot on the wall or ceiling below a bathroom is a bigger warning. Learn how to handle ceiling repair after a water leak before the stain spreads. Likewise, a damp wall needs a wall repair plan right away.
More Read: Pipe Repair and Replacement: Step-by-Step Homeowner Guide
Repair or Replace? A Quick Guide
- Repair when one part fails and the finish looks good.
- Replace when problems keep returning.
- Replace when parts cost nearly as much as a new fixture.
When to Call a Professional
Some jobs are not worth the risk. Call a plumber if you see any of these signs:
- Water stains that keep spreading
- Corroded or galvanized pipes
- Low pressure across the whole house
- A shut-off valve that will not close
- A leak inside the wall
Water damage can reach your basement too. Our home waterproofing guide explains how to protect it.
Simple Habits That Prevent Plumbing Problems
- Clean aerators every few months
- Wipe fixtures dry to limit mineral spots
- Test shut-off valves twice a year
- Fix small drips at once
- Avoid overtightening any connection
Conclusion
Faucet and fixture repair is easier than it looks. Identify the faucet type, gather the right parts, and work in a calm, clear order. Most leaks, clogs, and weak flow come down to one worn part. However, never ignore signs of hidden damage. When in doubt, bring in a pro.
Frequently Asked Questions
How long does a faucet repair take?
Most faucet repairs take under an hour.
What causes a faucet to drip?
A worn washer, O-ring, or cartridge usually causes the drip.
Can I fix a leaky faucet without a plumber?
Yes, most leaky faucets need only basic tools and a small part.
How much does a faucet repair cost?
Parts often cost under a few dollars, while a plumber adds labor fees.
Why is my faucet pressure low?
A clogged aerator is the most common cause.
Should I repair or replace an old faucet?
Replace it when repairs keep failing or parts cost close to a new unit.

Pingback: Water Heater Repair Guide: 10 Common Problems, Solutions - Guide Home Repair